Boomerang Snap Back Throttle - Linkert M Series Carbs
Boomerang Snap Back Throttle - Linkert M Series Carbs
Couldn't load pickup availability
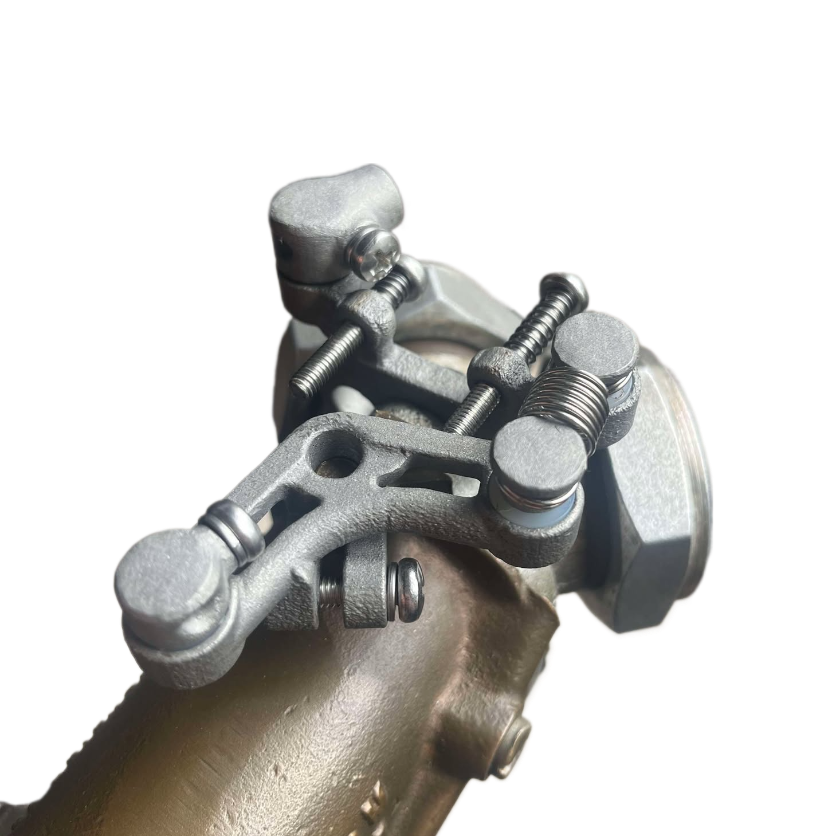
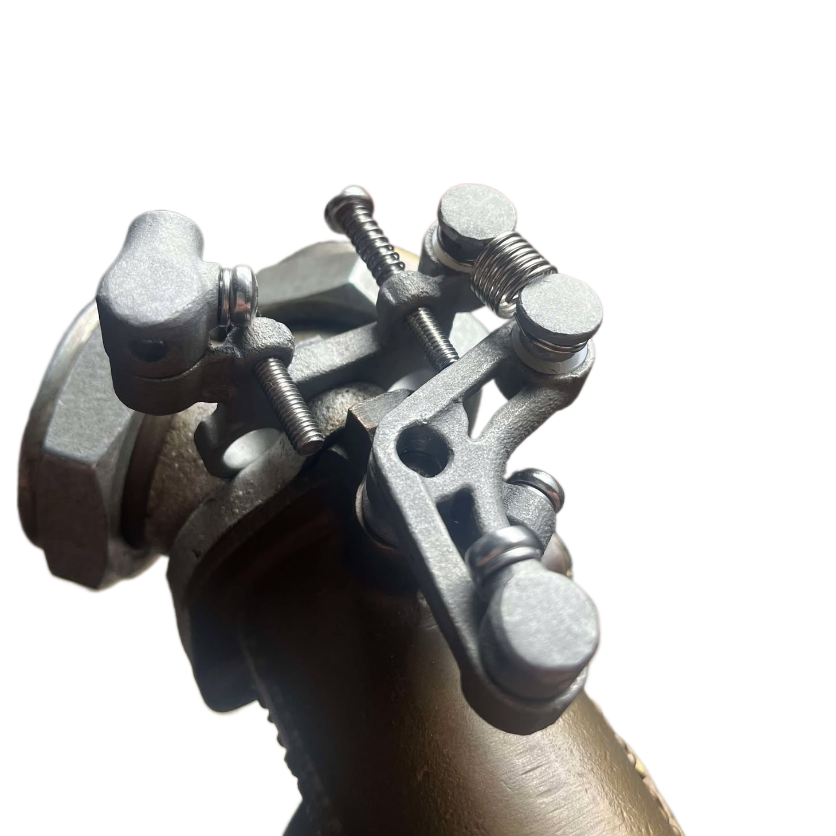
The Boomerang Snap Back Throttle
The Boomerang Snap-Back throttle linkage has been designed to retrofit to 3 & 4 Bolt Linkert "M" Series carbs with 1/4" throttle shaft and 5/16" mounting bolts commonly used on 1930-1952 Flatheads, 1936-1939 OHV Harleys and some Indians.
It will also fit Schebler DLX carbs with 1/4" throttle shafts, and 5/16" mounting bolts used on very early machines.
It does not fit Schebler HX Carbs, or Linkert DC carbs, I will have kits for them soon.
The throttle linkage is largely hidden when mounted to the bike, no more janky spring setups, no more flex, this thing is SOLID and is designed to fit the period of the machined to which it will be fitted.
BASIC KIT
This version will works with ALL EXTERNAL PULL, or PUSH throttle applications on Flatheads, Knuckleheads, Panheads, and Shovelheads across all years.
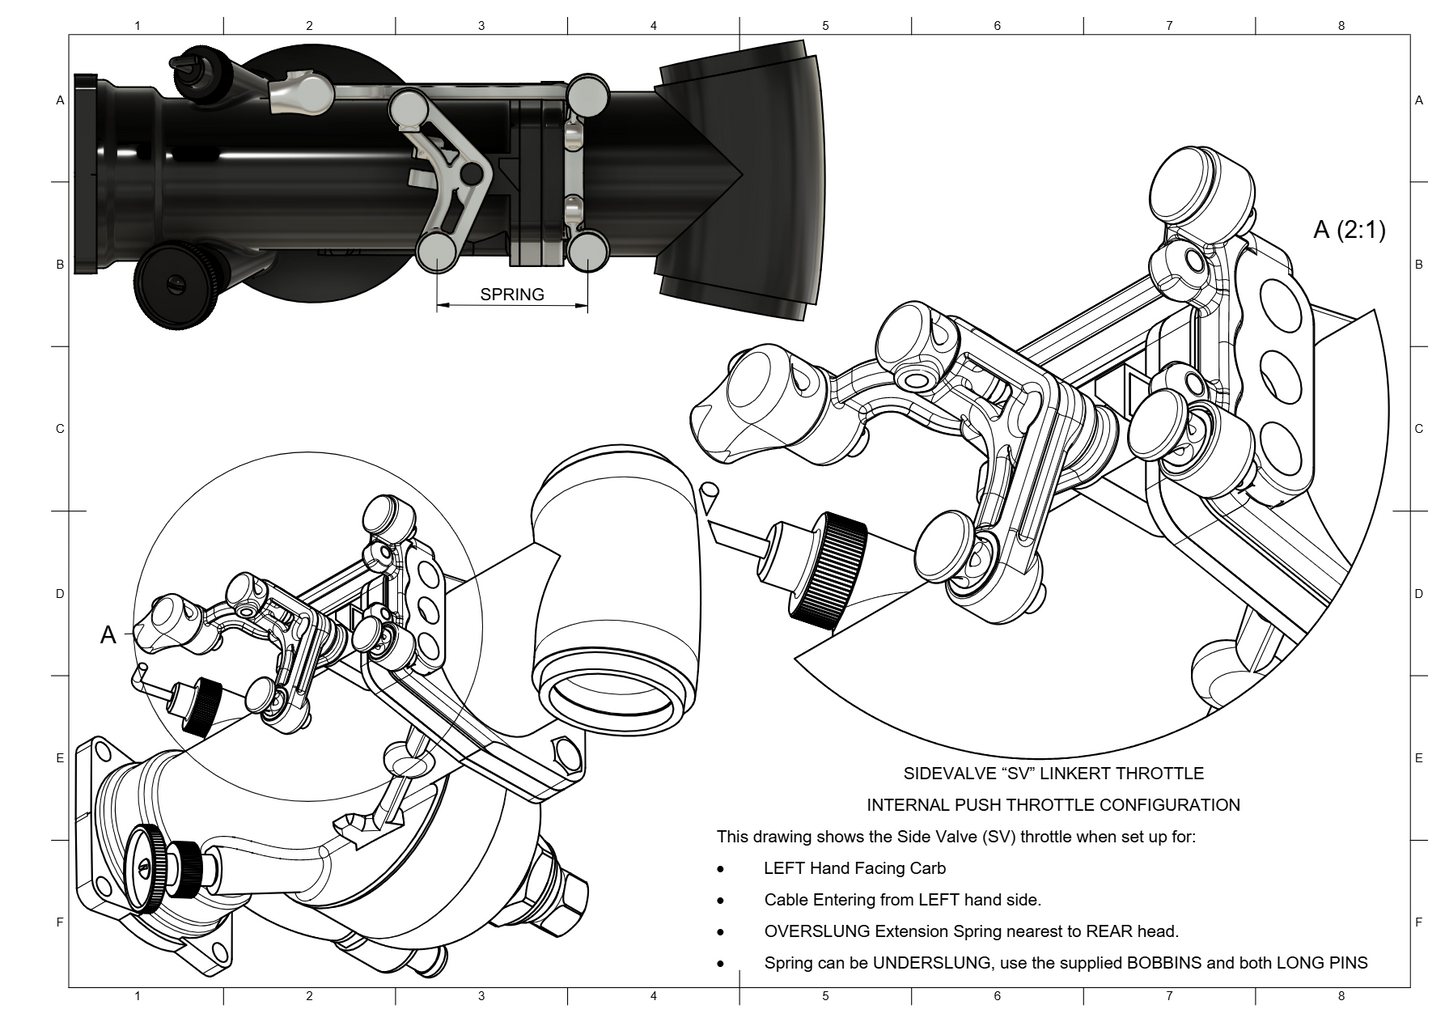
It also works on these these Side Valve (SV) Motor/Carb/Cable configurations:
- INTERNAL PUSH throttle with cable entering from the RIGHT hand side of bike
- INTERNAL PULL throttle with cable entering from the RIGHT hand side of bike
And these Overhead Valve (OHV) Motor/Carb/Cable configurations:
- INTERNAL PUSH throttle with cable entering from the LEFT hand side of bike
- INTERNAL PULL throttle with cable entering from the LEFT hand side of bike
OHV MASTER KIT
All options listed in the Basic Kit plus ALL INTERNAL THROTTLE OPTIONS for OHV bikes whose Carb point out on the RIGHT hand side of the bike
SV MASTER KIT
All options listed in the Basic Kit plus ALL INTERNAL THROTTLE OPTIONS for SV bikes whose Carb point out on the LEFT hand side of the bike
What Comes with the BASIC KIT?
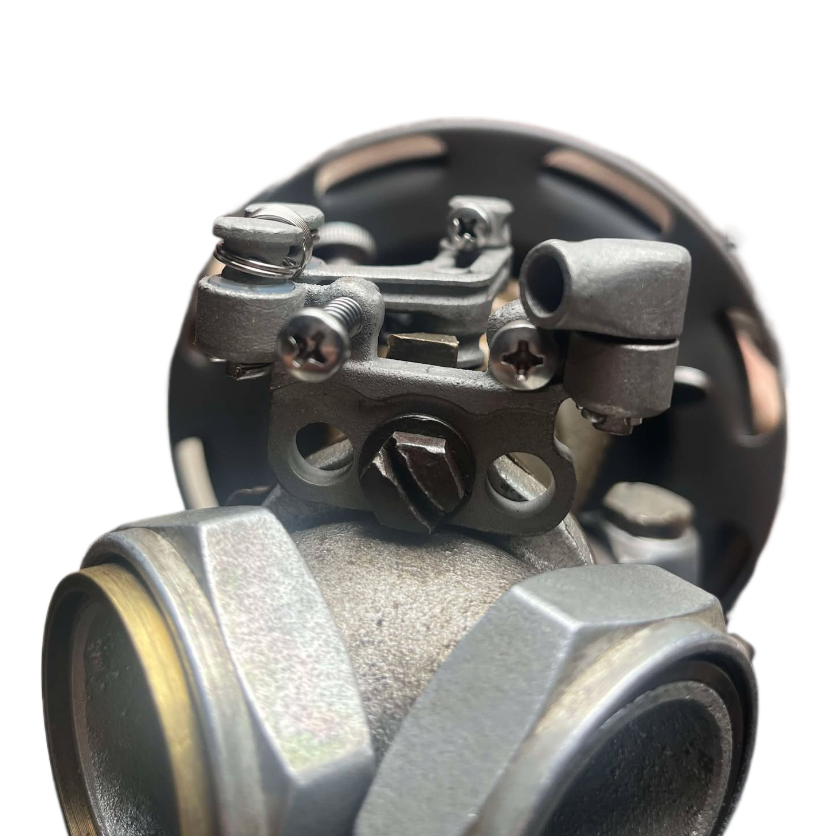
Rear Plate - Mounts behind the manifold, sandwiching the manifold between the rear plate, 1/4" Thermal Spacer and the Carburettor. (Mounting bolts NOT supplied)
Lever - Drilled to 6.35mm (1/4") this is a very snug fit. You can spread the opening a little if you want but I find there is rarely the need. what I do is tap it in place with a small drift, then adjust the butterfly position once installed. The lever is further clamped in place with am M4x0.7x16mm screw flat washer, and spring washer. Only 1/2 to 3/4 of a turn should be required to lock it down. A spare hexagonal head screw is provided should spanner access be easier for you.
Sheath Clamp (Supplied with Long AND Short versions) - This is where your cable sheath enters the linkage avoiding you having to clamp your sheath to your motor. The sheath clamp rotates on a shouldered nylon washer. It is held in place with a M1.6x16mm split pin. The sheath is clamped in place with an M4x0.7x8mm screw and allows the option to screw this in form either side to avoid any clearance issues. Again, a spare hexagonal head screw is provided should spanner access be easier for you.
Cable Clamp (Supplied with Long AND Short versions) - This is the component that holds the inner wire of the throttle cable. It is mounted to Lever through a shouldered nylon washer. It is held in place with a M1.6x16mm split pin. The sheath is clamped in place with an M4x0.7x8mm screw. Under this Clamp is a Spring Bobbin.
Surprise! another spare hexagonal head screw is provided should spanner access be easier for you.
2 x Long Pin - This Blanking Pin is mounted on the Rear Plate toward the rear of the bike and serves only as a mounting point for a spring bobbin.
3 x Short Pins - These Blanking Pins are mounted serve as aesthetics and to prevent loss of the nylon bushes in certain configurations.
2 x Spring Bobbins - The extension spring can be "Underslung" between the Rear Plate, and the Lever, we use these to make that happen. Each one is located by either a Long Pin, Long Cable Clamp, or Long Sheath Clamp. Each spring bobbin is secured with a M1.6x16mm split pin the same as all other component rotating in Nylon bushes.
2 x Spring Bobbin Pins - These spring bobbins allow for an Overslung spring in certain scenarios. The choice of Overslung, or Underslung springs is often an aesthetic choice, but I have left the decision up to you :-)
6 x Springs:
- 35mm x 0.8mm x 10mm
- 30mm x 0.8mm x 10mm
- 25mm x 0.8mm x 10mm
- 35mm x 1mm x 10mm
- 30mm x 1mm x 10mm
- 25mm x 1mm x 10mm
All are Stainless Steel extension springs with Closed Double English ends to ensure they cannot come off!
What Comes with the MASTER KITS?
All the above AND one additional rear plate with long arm specific to either the OHV, or SV use.
Throttle Feel and Spring Choice
Throttle feel is subjective, very personal, and affected by many factors such as cable type, length, and condition. To that end I have made my Overslung Bobbins slightly undersized, and cross drilled them to allow you to experiment with rubber bands hook end springs etc etc. This was done so as not to lock you into my preference, but also to allow you multiple options on the road to repairs.
Do not use 12mm diameter springs, they will be too large and could come off.
Carb Spacers - How they Affect Installation
If you use spacers between your manifold and carb, rather than a gasket then you will need a longer spring, and longer WOT/IDLE Screws.
I have included a wide variety in these kits already for you, within reason!
If you go daft with extending the carb beyond stock you will hit clearance issues with some options, but there will always be a way around it using other parts from the kit, get creative!
Installation
Remove the Carb and Manifold
Split Pin Notes: If the split pins are to tight for you, just use one side of them, or get a smaller one. I supply 1.6x12mm split pins but sometimes the combination of tolerances in the parts and nylon washers can lead to a tight fitment.
Bolt the rear plate behind the manifold using the stock mounting bolts that should already be on your bike (not supplied)
If you are using a three bolt carb make sure to take some time to ensure the plate is nice and level when tightened. if it is not level your Idle and Wide Open Throttle (WOT) screws will not align with the Lever correctly.
Next, Clean up your throttle shaft and remove any burrs, or corrosion.
Align the lever and press it on the Throttle shaft till the base of the lever pus a small amount of pressure on the throttle shaft anti vibration spring.......if you are not using this anti-vibration spring, your screwing up already, stop and go get one (OEM Part# 27291-32).
Don't worry about butterfly position until the lever is pressed into position. This lever is shipped to be SNUG and I often TAP it onto the shaft with a small pin hammer, in extreme cases I open up the clamping gap with a screw driver while tapping.
Now to set the CLOSED POSITION. Hold the butterfly closed with your fingers, while adjusting the lever till the spring "Just" starts to open. You need a very slight amount of spring pressure (where the coils just start to separate). Clamp the lever in place with its M4 screw.....DONT go nuts cowboy! You may need to work on this on the side of the road while you are high so just enough to compress the spring washer so it can do its job.
Now to set the WOT position. Sight down the carb and set the lever into the WOT position, then wind in the WOT screw so that it prevents any over travel. Now depending on your carb and your preferences the spring on the screw may be too long, jut trim it to suit with some side cutters. If you want you can replace with an M4 nut (supplied with the kit)
TWEAK the IDLE. Let everything go and the Lever should return the butterfly to the closed position. Add two full turns to the Idle screw so that it adds some extra spring tension. As with the WOT screw spring, I ship the springs over length so that you can trim to suit to get the the tension just right, or replace with an M4 nut (supplied with the kit)
Remount the Carb.
FIT THE SHEATH Insert the Sheath into the Sheath Clamp and tighten the M4 screw so that it holds the sheath but does not hinder cable movement. Remove any rubber sheath that you need to.
FIT THE CABLE Insert the inner throttle cable into the Cable Clamp, rotate the throttle to closed, tighten the M4 screw on the cable clamp till it holds the cable in place.
Fire up the bike
Set the Idle
Hug your family, tell them you love them, then go for a ride.
Safety and Words of Wisdom
- It is YOUR responsibility to ensure the safe operation of this part and its legality on the roads of your country. By building a custom bike you take on the responsibility for your work, respect that responsibility and show the next generation how to respect it so they continue the traditions!
- If you are not qualified to work on motorcycles please seen an approved professional to perform the work for you.
- I will not help you tune your carb, seriously! don't even call about that!
- If you loose a part, break a part etc. I can sell you individual spares.
- Some slight fettling of the part may be required. My quality is consistent but the product will ALWAYS vary between production runs....small batch life baby!
- I'm one bloke in a shed, in Australia, with a Wife, Dog, and 9-5 Job. I'm not a corporation, I'm not rich, and I don't intend to become rich of the backs of you lot so my profit margins are LOW so that you can do cool shit. Please remember this when dealing with me, lets all work together.